A recent visit from UK-based radio presenters on Gaydio.co.uk, Emma Goswell and John Ryan, had them raving about our Portland Essential tour which features some of the best of Portland’s car-free cycling infrastructure while explaining a bit about how Portland evolved into the city it is today. Top of their list of things to do when visiting Portland, their experience on out Essentials tour illustrated for them the ease of navigating Portland by bike, where they felt at ease on two wheels here in a way you just can’t get across the pond!
“It’s quite therapeutic when you aren’t filming on your phone with your other hand!”
We see a wide spectrum of bikes in the shop. Anything from full carbon race bikes worth thousands of dollars to 70’s cruisers with mostly sentimental value. Because we do repairs, usually people bring their bike in because something has gone wrong. Often they ask “how can I upgrade my bike?” Whether you’re looking for speed, reliability or style, we often want more bike in our bike.
How Can I Upgrade My Bike Cost Effectively?
The most affordable and effective upgrade you can give your bike is proper maintenance. It doesn’t matter if your bike is super light, if the chain is rusted and the tires are flat. Regular cleaning and fixing can also help you identify problems while they are still fixable. A good example is replacing your chain when it is worn. If you wait too long to replace it, an old chain can actually wear out the rest of your drive train. This means a new chain wouldn’t “fit” the wear pattern of your old chainrings and you’ll have to replace the entire system to get your shifting back to what it used to be.
One of the cheapest upgrades you can get is a set of new tires. A flat tire turns your bike into little more than a clunky accessory. Quality tires can reduce your encounters with this inconvenience substantially. I ride Schwalbe Marathon tires, which we carry in the shop. Many times I only notice a patch of glass after its too late to avoid and I ride right over it. With good tires, I roll right over these inevitable obstacles, unscathed. Higher quality tires can also help you grip the road during wet Portland winters.
A few other little upgrades that go a long way are your handlebars and saddle. If you are splendidly comfortable on your bike, great! If not, simple adjustments could turn your bike from a pain machine to a joy to ride. I’ve met a lot of people that suffer through uncomfortable saddles or poorly adjusted handlebars simply because they did not realize another way was possible.
Upgrading vs Getting a New Bike
Many people ask for advice on what I would upgrade if it was my bike. Sometimes, I hate to say it, but you’d be better of just getting a new bike altogether. Thrift store bikes are often donated because the owner calculated it was cheaper to donate than fix. Box store bikes are usually designed to be flashy and as cheap as possible. It entirely depends on what kind of riding you’re doing. Not everybody needs a sleek bike with electronic shifting that weighs as much as a sneeze. On the other hand, not everybody can tolerate a 50lb rust bucket that breaks every two or three blocks.
The key is to be honest with yourself about how you use your bike. If you commute in the rain everyday, it probably doesn’t make sense to spend hundreds of dollars on replacing your old steel rims and squeaky old components on your $40 Goodwill bike. You’d be better off spending that money on a new bike altogether. Even the most basic of modern bikes tend to perform better than any bike from the Cold War you’re bound to salvage from a garage sale.
So if you’re wondering “do I need to upgrade my bike, buy a new bike, or just adjust a few things?” come by the shop. We’re more than happy to help you improve your ride experience.
A savior. A cost. A helper. A hassle. In a bike-able city like Portland, it is important that we are able to see the road in front of us with enough lighting while responsibly allowing cars to identify us in the dark of night. Where some opt to take the risk as a creature of the night, this lightless lack of illumination loses in the long-run. Between the dangers of the dimly lit roads and the risk of receiving a fine up to $75.00 as a class D driving infraction, it is decidedly better to purchase yourself a bicycle headlight. But… What type of bike light should I buy? We’re here to help you decide the best bike lights for you!
Analyzing the Options
Well, first let’s understand the difference between battery powered versus USB rechargeable powered lights. In terms of cost, battery powered lights will almost always come at a lower price. Battery powered lights tend to emit fewer lumens (lumens will be the main factor when it comes to light options throughout this post). Lumen is the unit used to measure the total quantity of visible light emitted by a source as related to the human eye’s sensitivity to wavelengths. When traveling at night in well lit areas the lower lumens with a battery powered light may suffice. Using batteries also allows the ability to carry spare when you run out of juice should the situation arise.
When opting for USB rechargeable lights, you won’t be able to throw in these spare batteries, but the benefits are quite overwhelming. With USB charge, lights are capable of emitting a much higher amount of lumens. With more lumens, there will be more options of places to safely travel by bicycle. The batteries are also rechargeable. When the time comes, as opposed to needing a new set of batteries, the USB plug will be able to give you the kick you need without the extra charge, paying off the extra cost of selecting USB.
In order to provide insight toward bike light preferences I asked some of my co-workers what their preferences are:
Quoc – Mechanic
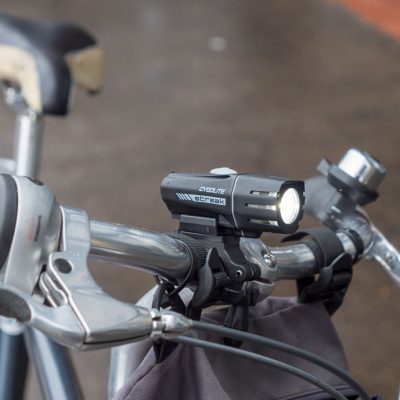
“As a commuter traveling to and from Hillsboro, I use a USB rechargeable light with 300 lumens but I plan to upgrade to a 450 lumen soon. 450 is probably best for price point and also gives you more comfort in terms of safety when traveling in different parts of the city. Without cost consideration I’d even say push up toward 750-1000 range. At the end of the day whatever makes you feel safest as an unprotected cyclist on the road. When I’m biking home listening to David Bowie, more lumens means more safety. No need to be a “Rebel, Rebel.”
Shop Choice- Cygolite Streak 450 Headlight
Frederick – Tour Guide
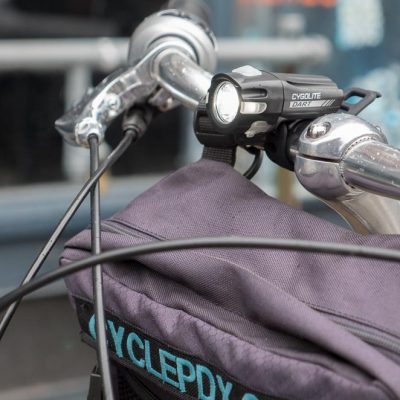
“1000? That’s a lot. Lights on cars only hit 700 on their low beams. You’d certainly be making yourself known out there in the roads. I had a 300 but when it ran out of batteries I just stopped buying new ones. Now I use a small blinker that works just fine for me as I only really bike within the city at night time. I think 250 lumens is about all I’d need as a commuter here, but definitely with a USB rechargeable. It’s nice to have a battery powered set for back up, especially during the winter. During my time in Tanzania, I didn’t have easy access to power outlets. With this luxury in the United States, I find it better to recharge rather than purchasing new batteries on a bi-weekly basis.
Shop Choice- Cygolite Dart 210 Headlight
Jesse (me) – Tour Guide
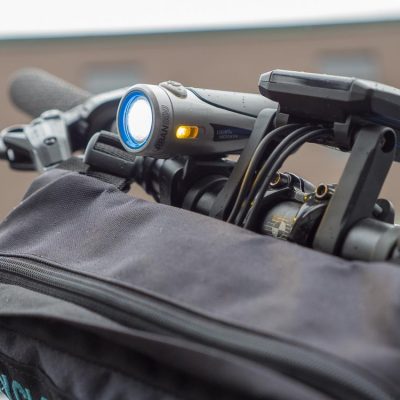
“Yeah. Definitely USB is the way to go personally. I think if I wasn’t a regular commuter batteries would be perfect for the occasional night time ride. As it is, I like to have options with my lighting as I never know where I’ll end up on my bike. So pushing up toward 800 lumens is totally feasible to me. Additionally, I’ve had 2 headlights stolen off my bike since I’ve moved to Portland. This is due to both my ignorance and my frustration in taking bike lights off and putting them on. For me, it’s important that my light can easily slide on and off so it becomes a simple habit for me to practice.”
For more info on how to avoid bike accessory theft, check out this article.
Shop Choice- Urban 800 Headlight
In summary, as regular commuters with daily access to USB chargers, USB rechargeable lights have more benefits. Your lumen choice, however, comes down to preference. I hope this article can help you answer the question what type of bike light should I buy? Remember, with greater lumens comes greater cost. With greater lumens comes greater possibility.
We get it. When you get home from a commute in the rain, you aren’t thinking about the loving care you’ll give your bike when you get home. You’re thinking of showers, soup and doing anything but biking. Winter is the unfortunate season where your bike needs your attention the most. Funny how the season your bike needs the most maintenance is also the season you are most likely to arrive home wet, tired, and ready to throw your bike in the garage without a second glance. But wet weather bike maintenance is important to us here at cycle Portland, we’ve talked about it in the past and we’ll talk about it again. We want you and your bicycle to last through the soggy season.
Braving the Soggy Season
Wipe Down
If you’re anyone with a penchant for a clean back and legs while riding, you probably already have fenders, if not kudos to you. Dirt tends to build up on the inside of the fenders, so take off the wheels and just wipe it down. Taking a few mins to dry off the bike after coming back from a ride will do you wonders.
Wipe down bike with wet and soapy sponge or rag
Rid of the Gunk
Start off by taking off the gunk that’s built up, use a sponge or rag and soapy water. Have a bucket nearby to dunk it. Wipe starting from the handlebars, up and down the frame, not to forget the underside of the saddle where majority of dirt will end up if you don’t have fenders. Or you can be super quick about it and spray it all off with a water hose. Be careful to avoid spraying into parts that have bearings as the grease inside can be washed off. Headsets, bottom brackets, wheel hubs. Everything else is game though, just remember to wipe it dry after and not let it sit. Otherwise you’re back at square one with a rusty everything.
Lube it Up
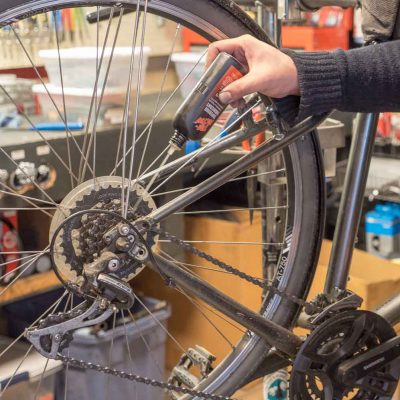
Chain is important, probably the most important thing on the bike. So obviously it takes a beating when the rain starts getting in between all the rolly bits. Dirt and grime build up on the drivetrain wears it down faster, leading to more parts needing replaced = mo money spent 🙁 A good way to avoid that is using chain lube and not just any lube, wet lube works best in the wet season. Want to use dry lube? Good luck because that’ll wash right off in the rain leaving it vulnerable to the elements. Wet lube is hydrophobic, it repels water but at the cost of picking up more dirt. Otherwise you’ll be using it all year amirite? A common misconception is spraying WD-40 as a lubricant would work just as well, it doesn’t; it’ll actually rust faster since it’s a water displacement. When adding your lube, make sure to get in between the pins and rollers of the chain, since those are the parts that actually make contact with the cogs and such.
Tri-Flow lubricant for your chain
Rid of More Gunk
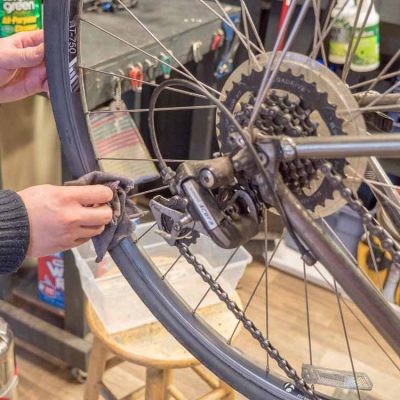
After this, run through the gears and wipe off excess, super simple. Another important thing to keep in mind is to check the dirt buildup on the jockey wheels, and while you’re at it, check over the entire drivetrain for any signs of buildup. Use a flat head screwdriver or something thin and flat to get in between the cogs of your cassette to squeeze out all the grime stuck. Lube any moving part with a few drops, derailleurs especially. More dirt = less efficient shifting and faster wear. Better to lube too much than too little.
Squeeze out the grime inside cogs with a flathead screwdriver
Check for Wear
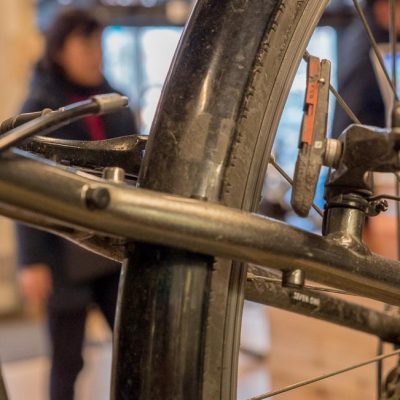
Check brake pads for wear since they tend to go quicker riding in wet seasons. Try using dual compound ones for that extra grip and saves you money in the long run when you won’t have to continuously buy more pads. Additionally, exposed cables can rust and pick up dirt leading into the housing itself. If your shifting is a bit gummy or slow, try running lube down the cables into the housing and shifting up and down. Same for brakes, lube the springs and barrels so they don’t corrode. Don’t forget to wipe down spokes if there’s any dirt or buildup, rusty spokes will pop and break if it’s corroded too long. It really saves you a bunch of headaches in the future. If you like your bike squeaky and generally not fun to ride, ignore this post.
Dual compound brake pads to get through the soggy season
Year Round Care
We say its for the soggy season, but realistically, it’s important to do these things throughout the lifetime of your bike despite the weather. Bikes are susceptible to corrosion, wear & tear, and most importantly that schmutz. Upkeep of your bike will make your life easier, your bike happy, and the best part is you won’t have to spend all o dat money on new parts just to keep it riding smoothly. Do your best to keep your bike inside whenever possible as many of the issues mentioned stem from leaving it outside for extended periods of time. If you ride often or commute everyday, I’d recommend having a tune up at your local bike shop at least one to two times a year. But if you practice solid wet weather bike maintenance, you won’t need a tune up for a good while!
TL;DR – LUBE EVERYTHING (if possible, but don’t lube things that aren’t needed)
Bike theft is a great example of bad things happening to good people. We hear a lot of cases of this from people who come into our shop. Yesterday a preschool teacher told me both her wheels had been taken off her bike in broad daylight outside the school where she worked. This is among the lowest of crimes, but it need not be inevitable. That said, I’m sure if your bike is stolen, you’ll want to recover your bike.
Register and Recover Your Bike
Before you do anything else, register your bike! Seriously, open up a new tab and go to bikeindex.org. Make an account and register your bike. A photo is super helpful, and the more detailed description of your bike the better. At least include the make and model of your bike. But the key is the serial number. This is your bike’s unique number that can be used to positively identify it in the event it is stolen. To find it, turn your bike upside down and look for a number stamped into the frame near your crank. On your, the code may be at any of these locations.
It’s that code closest to the crank on this bike
We run serial numbers of bikes that come into the shop. From time to time we do find that the bike is listed as stolen and we are able to return the bike to its owner. What is more discouraging is when we see a bike with many signs it has been stolen, but searching the serial doesn’t find anything because the owner failed to register the bike before it was stolen. The only thing better than not losing your bike is the amazing feeling of relief and content when you recover your bike! When your bike is gone it is too late to record the serial number!
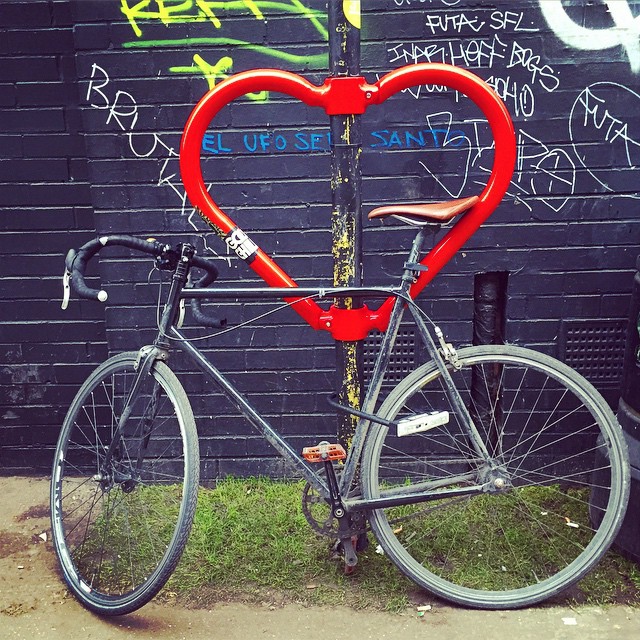
Now That You’ve Registered, Lock Your Bike
Practicality plays a role, sure. You aren’t going to ride everywhere with a vault and armed guards to protect your bike. Good news is you can prevent the vast majority of bike theft with basic equipment and vigilance. While no security is absolute, bike theft is usually committed by opportunists looking for the lowest hanging fruit.
The first thing you’ll need is a strong lock. We recommend a U-lock as a minimum precaution. We carry Kryptonite locks in a range of security levels and sizes. I’ve heard plenty of stories of shocked ex-owners who insisted they locked their bike. When pressed, they usually admit they used a cable lock. The same preschool teacher I mentioned earlier told me she once woke up to find a shopping cart locked to her bed with a cable lock. She was able to cut it off using a basic pair of scissors and a little persistence.
If you’d like to protect your wheels from getting stolen, using a cable to secure your wheels in addition to a U-lock is a good idea. Just don’t use a cable lock by itself. For even more security, consider replacing quick-release skewers with locking skewers. We carry several kinds, ranging from skewers that can be removed with basic tools to ones that require unique keys (the most secure option). We use locking skewers for all our rental bikes and recommend them for anyone looking to keep their wheels safe.
At the very least, Make sure to capture the main triangle of your frame and your rear wheel with your U-lock. Believe it or not, I’ve seen bikes in downtown Portland with only their wheel locked to a post. Once I even saw two bikes zip-tied together around a post. Don’t let this be you.
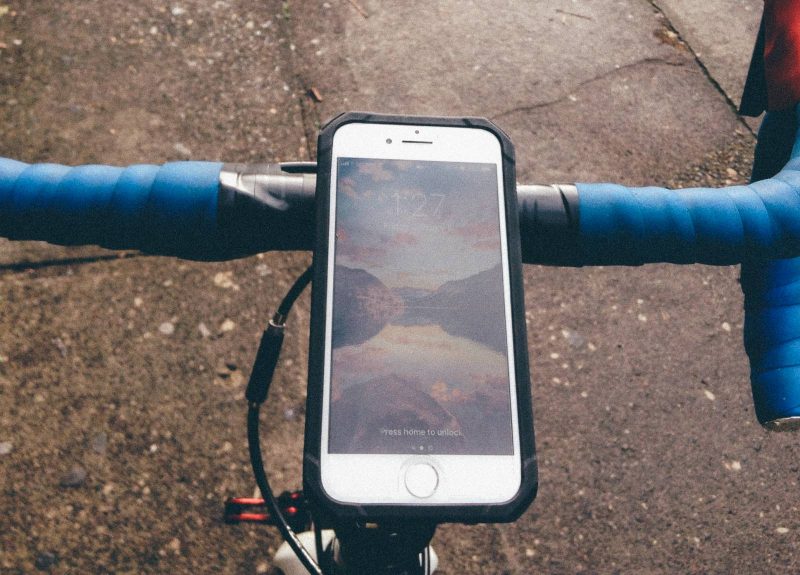
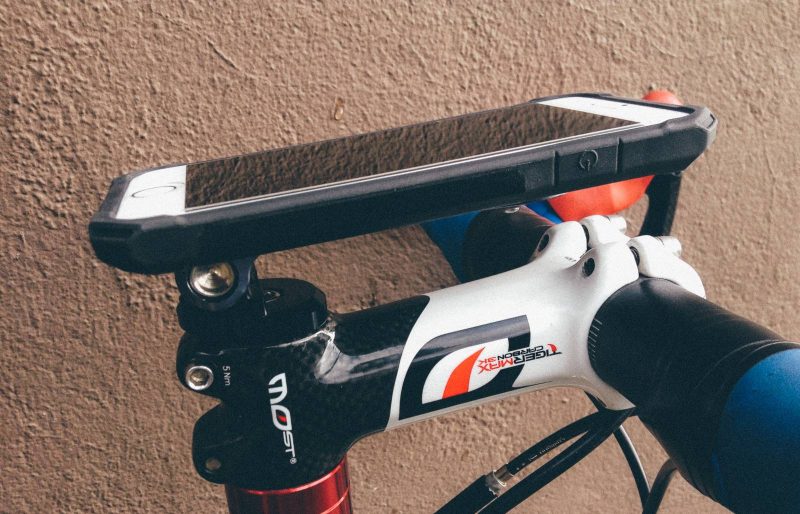
Are you tired of not having your phone in front of you while biking? Ever wonder of a more convenient way to view your messages and calls while logging in your miles on strava? Well now there’s a secure way to do it and look awesome with this bicycle phone mount from Rokform
Here’s what it looks like mounted
Rokform Pro Series iPhone Case (Headset Mount)
Rockform distinguishes itself from other companies making a bicycle phone mount with not just one, nor two, but three ways to make sure your phone doesn’t detaches itself from your steed. The bicycle phone mount uses a clip-on design most people are familiar with. The case then uses a magnet right under it to stay in place. And if you’re feeling antsy on top of that, you can tie a lanyard to the mount and wrap it around the handlebars. Extra protection for your precious lifeline to the outside world.
Rokform bicycle phone mount on headset
The case I’m reviewing today is the iPhone model with pro series mount. The mount itself attaches onto and replaces the top cap of the stem. It’s quite light and made of solid aluminum, another big plus is that they’re all manufactured in the US! The phone case is durable and shock absorbent, fairly standard stuff. It has a magnet that slides in on the backside to provide extra security when clipping it on the mount. The mount attaches with a four-prong slider, which took me a bit of getting used to.
One thing you’ll notice is the price, the mount and case go for $99 as a pair. Considering they make the mount here in good ol USA, it’s understandable. The finishing is beautiful in an almost silver blue, with a magnet attached to the underside hidden from view. If you’re worried the slide mount isn’t enough or if it’ll ever wiggle free if it ever does, the very same magnet is strong enough to hold it in place! I’ve tried in multiple ways to see how well it does in common situations such as running over potholes, dropping off a curb, sliding into a fall, and it holds it firm as ever.
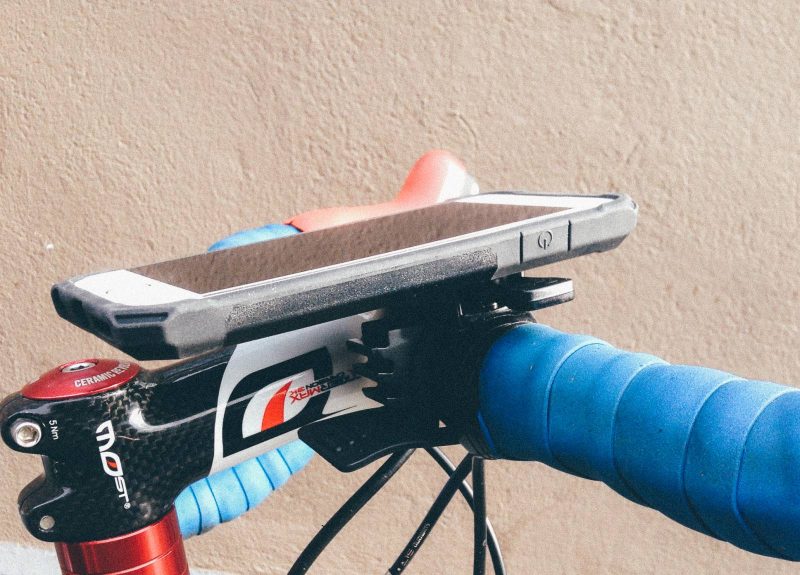
Handlebar Mounting Option
It also comes with a handlebar attachment that is just as secure. Instead of the magnet, it uses a lever to keep it in place. If you don’t have any room left on your handlebars, go for the headset attachment. If space is not a concern, both are excellent choices.
Rokform mounted on handlebars
As for the Rokform Phone case, it does the job well holding my phone in place. With a hard resin plastic backing, it gives the case a much desired support together with the rubber sides. It is a bit bulky, but considering it is meant to be used outside, this is pretty average. The other thing is unless you have a waterproof phone, there is no weather proofing whatsoever on the case. Which is not such a big issue if you’re a weekend sunny day rider or casual commuter.
Overall, I the Rokform bicycle phone mount is a great option for anyone looking for a solid way to mount their phone on a bike. Many other designs are less secure or cover part of the screen. This mount is a good marriage of convenience and security that I would reccomend to anyone looking for a better option.
What is your Portland valentine’s day dinner missing? Are you looking for something fun, adventurous and delicious? Cycle Portland is now offering a romantic afternoon around the town by bicycle! Stop on in and pedal your heart out with a loved one. You’ll have dinner, dessert, and a knowledgeable tour guide for a full experience in the beauty of Portland. Sign up now (signups now full) for your Portland Valentine’s Day Dinner Bike Ride!
Image courtesy of Ian Sane under Creative Commons 2.0
Portland Valentine’s Day Dinner Journey
Limited to only 6 participants, prepare for an amorous afternoon! First, you’ll start at Cycle Portland Bike Tours & Rentals where you and a significant other will be fitted on your bikes for a comfortable ride through the city. Next you’ll make your way down the west side of the Willamette waterfront to the historic Hawthorne Bridge. Although thousands commute daily by bike over this bridge, only few do so with a loved one next to them. While biking across, take in the amazing view overlooking the city. Following this lovely view you’ll pass below Portland’s newest and most bike friendly bridge, the Tilikum Crossing. After that, you’ll make way toward Clinton Street to ride the legendary bike boulevard.
Alas, you will arrive at your first stop, Pastini Pastaria, for a delicious dinner! The Pacific Northwest is abundant in sustainable farms, beautiful vineyards and incredibly clean water. Notably, Pastini brings responsibly sourced food to your table with delicious made from scratch meals. With over 3,000 dining options throughout Portland it isn’t easy to stick out amongst the crowd. However, Pastini has become an amazing option. Emphasizing fresh, local ingredients, Pastini and its owners are personally involved in every aspect of the restaurant. Happily share in this classic romantic Italian style dinner. You’ll receive one delightful dinner entree per person but feel free to recreate scenes from lady and the tramp!
Image courtesy of @markheybo under Creative Commons 2.0
Next you’ll burn off some of those calories biking through the remarkable Ladd’s neighborhood. Pass wonderful American Elm Trees and craftsmen style houses before in chocolate with dessert at Alma. Historically, chocolate has been associated with passion, and Alma knows their stuff. Significantly, this Portland icon plays host to delicious hand dipped bon bon’s. Their combination of single origin cocoa paired with locally sourced flavors make this an excellent way to round out an affectionate afternoon.
Signups Full For 2018
Join us for a Portland Valentine’s Day Dinner Bike Ride! Our tour will depart 3pm from our shop on 2nd and Couch.
Image courtesy of Ms. Pheonix under Creative Commons 2.0
When planning what to bring on a bike tour, gear is not the least of your concerns. Luggage may not be as exciting as your choice of route or companions. However, preparing thoughtfully for your trip can make the difference between comfort and a grueling slog, or between a minor hiccup or a total breakdown. With our combined touring experience here at the shop, we’ve learned what works for us. It can be incredibly valuable to make a checklist in order to help prepare for your tour. Ultimately what you decide to bring will depend on the style and length of your trip, as well as your personal traveling preferences.
What to Bring on a Bike Tour
Riding Gear
The first decision to make is how much you are willing to “rough it”. If you will be biking from hotel to hotel and eating in restaurants, a credit card will be your most important piece of equipment. If you’re riding farther afield and camping, you’ll need carry everything you’ll need. Keep things you’ll need during your ride in smaller bags or in jersey pockets. Otherwise you’ll be digging through your panniers looking for your squished banana.
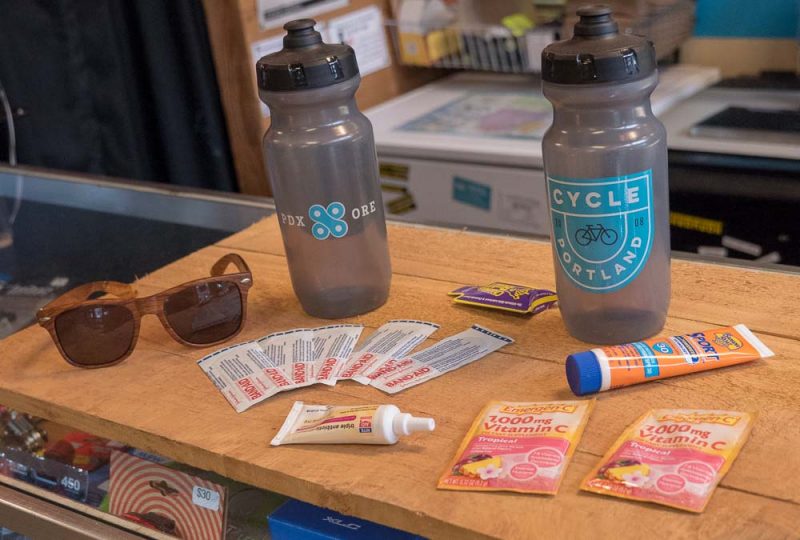
Water bottles: 2-3 can be mounted on your bike. Crushable bottles like Platypus are good for extra water storage if you’ll be riding long stretches between water sources.
Sunscreen
Money and Identification (I like to keep it in a small plastic bag in my jersey pocket)
Phone, charger, and any foreign sim cards or solar panels you may need to make it work
Basic first aid kit
Toiletries (still important to brush teeth on a bike tour!)
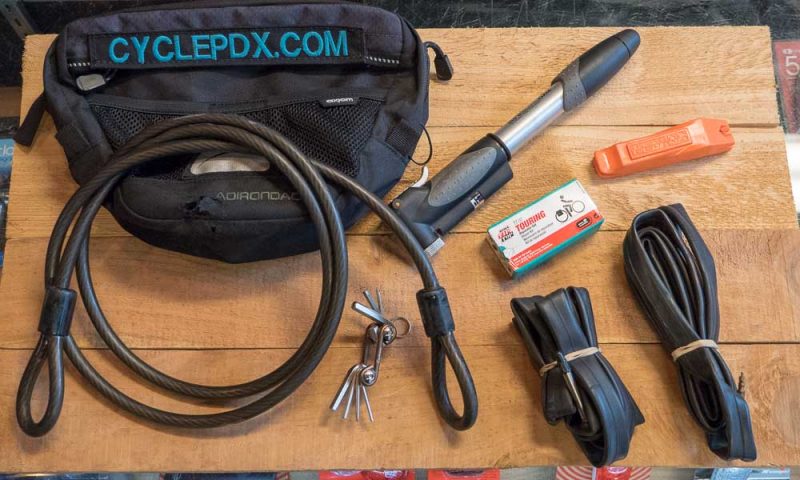
Unless you are doing a supported ride with a follow car to pick you up, you’ll need to be self-reliant. At the minimum, you will need to be able to fix flat tires and tighten/loosen all bolts on your bike. If riding with others, you will probably only need one set of tools between you, with the exception of tubes.
Spare tubes: 2 or more(make sure they are the correct size for your tires, especially if you have different tire sizes)
Set of hex keys, in a multi-tool or separate (check every bolt on your bike to make sure you have a tool that fits it)
Lock (U locks are the most secure, but heavy. If you’ll mostly be stopping in rural areas or are riding in a group, a cable lock will probably suffice.)
For longer or more remote riding, consider bringing extra tools. Hopefully you won’t need them often, or at all, but the little extra weight can pay off when stranded in the middle of nowhere.
Extra spokes: at least one per wheel (each wheel side requires a different spoke length, so make sure you have the correct lengths!
Spoke wrench (also wheel-specific)
Chain breaker (included in some multi-tools)
Spare tire (foldable tires are much easier to carry)
Duct tape (I like to wrap it around my water bottle so I don’t need to bring the whole roll, but you could use your seatpost or anything else)
Small bottle of bike lubricant
Lights, especially if you’re not riding during summer
More general tools like pliers, knife, screwdrivers, etc. – a lightweight multi-tool is a great way to get most of these functions in one small package.
Cable Ties – For some of our staff, cable ties are the new Duct tape, and very useful in a pinch!
What else?
Is this all I should bring on my bike tour? No… But, these are just the most bike-specific things you’ll need to pack. You’ll find our checklist for other supplies including camping gear, clothing, and more in our soon to come post Touring Checklist: What to Bring on a Bike Tour Pt. 2.